Wednesday, November 5, 2014

Empanadas Argentinas/Argentinian Empanadas

Nossos hermanos são caprichosos! Inventaram os tango e alfajores, são bons de bola e de churrasco (mas não melhores q os brasileiros! Hehehe) e, na minha opinião, fazem as melhores empanadas do mundo!
Aqui uma versão adaptada meio brazuca do calendário culinário da Nestlé de 2014 (adaptei pq não usei caldo Maggi picanha nem os 300g de carne moída da receita original.)

- Massa
500g farinha + extra para salpicar e abrir a massa
½ xícara de manteiga gelada
1 xícara de água ligeiramente morna (30s no microondas)

1 col (chá) sal
1 gema batida para pincelar

- Recheio
750g carne moída (não muito magra)
1 cebola picadinha
1 col (sopa) azeite
1 col (sopa) molho inglês
1 col (chá) Orégano seco (ou temperinho de chimichurri se vc tiver)
1/2 col (chá) páprika
1/2 col (chá) mostarda em pó (ou Dijon, se vc ñ tiver o pó)
Salsinha fresca
1/8 col (chá) cominho
Sal e pimenta do reino
2 col (sopa) farinha
2 col (chá) molho de pimenta (ajuste de acordo com o grau de picante desejado)
Pitada de pimenta calabresa seca
Azeitona picada a gosto (aprox 2 col de sopa)
Água para fazer um caldinho grosso (aproximadamente ¼ xícara. Vc tb pode usar caldo de carne, se preferir)


PREPARO

- Recheio
Em uma panela de fundo grosso, frite a cebola no azeite e doure a carne. Acrescente a farinha e misture bem. Adicione os temperos (exceto a salsinha)e a azeitona e cozinhe a carne por completo. Acrescente a água aos poucos só até formar um calsinho grossinho. Mexa bem e deixe cozinhar em fogo baixo por aproximadamente 8 minutos, mexendo de vez em quando, sem deixar a carne secar por completo. Acrescente a salsinha e misture.

Enquanto a carne esfria, faça a massa:

- Massa
Em um bowl grande coloque a farinha e a manteiga em pedaços. Misture grosseiramente e acrescente a água aos poucos. Misture bem com a mão e acrescente um pouco mais de farinha caso seja necessário. A massa deve desgrudar das mãos. Não é necessário sovar, aliás, melhor não sovar para não formar muito glúten e a massa não ficar elástica!
Abra a massa sem deixá-la muito fina. Corte as empanadas com um copo de boca larga ou um cortador de biscoito redondo de 25cm de diâmetro. Cada receita deve render entre 20-24 empanadas.

Recheie sem exagerar a metade de cada disco e feche-o dando o formato da empanada. Grude as bordinhas do disco e use um garfo para “selar”. Pincele cada empanada com a gema batida e leve ao forno (180C) por aproximadamente 20-25 minutos ou até que as empanadas fiquem ligeiramente douradas. Sirva com molho de pimenta!

Recipe in English:

Argentinian Empanadas

Dough
1.1lb all-purpose flour
1 cup lukewarm water
½ cup cold salted butter
½ teaspoon of salt
1 yolk, beaten (to brush each unit before baking)

Filling
1.5 lbs ground beef  (85/10 or 85/15)
1 small diced onion
1 T EVOO
2 T flour
1 teaspoon dried oregano
½ teaspoon paprika
½ teaspoon dried mustard (or Dijon if you don’t have it)
1/8 teaspoon cumin
1 T Worcestershire sauce
A pinch of red pepper flakes
1 teaspoon Frank’s Red sauce
Approx. ¼ cup beef broth
S&P
A handful of Italian parsley chopped fine
2 T minced green olives

Sauté the onions in the olive oil and then add the ground beef. Let it brown. Add all the seasoning and flour (except for parsley). Mix in and cook completely, approximately 10 minutes on medium heat. Add the broth little by little just to thicken and make beef moist. Make sure not to add too much liquid.
Let it cook on low heat for 8 more minutes, uncovered, stirring occasionally.  Add the olives and parsley.
Make the dough while beef cools.

In a large bowl, add the flour and salt. Whisk together. Add the butter in pieces and the water little by little. Mix with hands until dough isn’t sticky and it comes off your fingers. Add a bit more flour if necessary. Don’t knead so empanadas aren’t chewy.
Sprinkle some flour on a surface and open the dough. Using a cookie cutter (12”) cut 20-24 empanadas. Careful not to make them too thin!
Stretch each disk a bit to make them slightly bigger and fill each half with a generous portion of the cooked, cooled beef mixture. Cover it by pulling the opposite half of the disk giving the empanadas a half-moon shape. Using a fork, seal the edges.
Brush the beaten egg yolk on each empanada and bake (preheated 375F) for 20-25 minutes or until golden brown.
Enjoy with a dash of hot sauce. I dare you to eat only one! My husband ate probably 8 at once and he wasn’t even “THAT” hungry!

Monday, August 25, 2014

Lemon & Almond flour cupcakes with blackberries buttercream frosting

Just a good recipe with a twist for lemon cupcakes.

The buttercream frosting with fruits is a show stopper even you're not a fan. It just has such a beautiful color! Make the buttercream as tart as you'd like by adjusting the amount of sugar. Add some slightly mashed blackberries for added texture and color if you don't mind the seeds.

I made a batch for a friend's b-day at the office and my husband stole one. He's not much a sweets kind of guy but all I know is that he came back upstairs and said he loved it! Made my day so I felt like this recipe was worth sharing.


For the cupcakes
1 stick (8 T) unsalted butter, room temp
1 cup (leveled, minus 1 T) sugar
1/2 T lemon extract
zest of 1 lemon
1/2 teaspoon vanilla extract
2 eggs whole plus 1 yolk
1 cup milk
1 T lemon juice or vinegar
1 T half and half
1 cup cake flour (preferably)
1/2 cup almond flour
1/2 T baking powder
1/4 teaspoon salt

In a stand mixer, cream the butter with the eggs and sugar. Add this last one little by little. While it's creaming, add the lemon zests and extracts (vanilla and lemon). Set aside.
In a measuring cup, stir the milk with half and half and lemon juice. You'll use it in a little bit.
In a large bowl, whisk the dry ingredients: cake flour, almond flour, salt and baking powder.
Turn the mixer back on on low speed and add the dry mix and liquid, alternating, finishing with liquid. About a third at a time.

For the frosting
1 stick of unsalted butter, room temp (= 8 tablespoons)
2-3 cups of confectioner's sugar, sifted
1 teaspoon vanilla extract
3-4 T pureed blackberries, seedless

In a little food blender or chopper, puree approximately 1/2 cup of blackberries. Transfer it to a sifter and push it through with a spoon.
In a large blender, cream the butter and add the confectioner's sugar little by little. Halfway through, add the blackberries puree and the vanilla extract. Add 2 cups for a softer frosting and 3 cups for extra hard, sweeter frosting according to taste. Also, the more sugar, the lighter your frosting will look if you follow the amount of blackberries here. You could probably add more blackberry puree with 3 cups of sugar and the consistency will still hold. I just haven't tried yet.
Fill a 24 in decorating bag and use a large cupcake decorating tip. Leave it in the fridge for an hour or longer.

Pre heat the oven to 350 degrees Farenheit. Bake the cupcakes into a 12 tin pan or 10 of those taller liners (mini cake) for approximately 15-20 minutes (depending on the liner size you're using) or until a cake tester comes out clean.

Let the cupcakes cool for an hour or 2 before decorating. Take the frosting out of the fridge 15 minutes before piping so it's softer and easier to decorate.

Make sure not to add too much sugar to the cakes since the frosting is already pretty sweet! Adjust sugar in the frosting to your taste!

Double the recipe if you also want to use this as filling!

Happy baking!

Tip

Cake flour is just an excuse the large flour producers found to charge you more for something extra cheap! All purpose flour is not the best for cakes, indeed, but all you need to do is replace each cup of flour from the recipe by 3/4 cup of flour + 1/4 cup of corn starch, leveled and sift before mixing in the recipe. Pretty easy! Fluffy cakes guaranteed! That's what my grandmother and my mother always did when baking cakes. Little did they know they had a secret in their hands!

Friday, August 22, 2014

Spanish Tortilla

Eggs are definitely my favorite ingredient to work with!
They are so versatile! They can be used for sweets and savory dishes, they give cakes structure and they last forever if kept in the fridge (as they should be here in the US since eggs are pre washed prior to going to stores and any minimum moisture left in an egg shell can serve as a growth medium as well as allow growing bacterias to get into your egg! UGH!)

Which reminds me of a very interesting article I once read (below) that explains different handling methodologies for eggs in the US versus Europe. Very interesting if you have time for the reading: http://www.forbes.com/sites/nadiaarumugam/2012/10/25/why-american-eggs-would-be-illegal-in-a-british-supermarket-and-vice-versa/


But anyway... Back to the recipe!

So I had to make a quick lunch today and realized I had no leftovers in my fridge and nothing to thaw in my freezer! Before I started to panic, I opened the fridge and saw the carton of eggs and half an onion. But I didn't want to eat a plain omelet... Then it hit me! A dish my mom used to make all the time when I was a kid: SPANISH TORTILLA! I didn't really like it back then, I'll be honest, as I'm not a huge fan of potatoes but then I realized I could sautee them first and make them crispy to help improve the flavor. I also had leftover cream and parmesan in my fridge so I knew any dish I decided upon couldn't taste bad. Grab that old potato there in the back of my pantry and voilà... A fast feast!

Spanish tortillas are basically a thick omelet  with potatoes and, as far as growing up where I did, some onions sometimes too. Feel free to skip these if you don't have any or if you don't like them. Sautée the potatoes and onions for extra flavor but don't feel guilty if you don't have time for this step as the dish will work just fine without it.

> Ingredients: (for 4)

1 large potato, steamed, diced small
4 eggs (any size!)
1/2 large onion diced small
1/2 T vegetable oil
1/2 T butter
1/8 teaspoon of paprika
salt & pepper to taste
3 T heavy cream (optional, I had in my fridge so I used it. Can be replaced by milk)
1 T Corn starch mixed with 1/4 teaspoon of baking powder (optional, only if you're using the milk or cream)

  1. Pre heat oven to 400F.
  2. Beat the eggs in a bowl with the paprika, salt and pepper. Add the cream (or milk) mixed with the corn starch and baking powder if you're using them. Set aside.
  3. In a large nonstick skillet, heat the oil in high heat and sautée the diced onion and potato cubes. Let them form a nice crispy brown outside, sautee them (or stir) every now and then adding the butter halfway through.
  4. When they're golden brown and fragrant, about 5-8 minutes, lower the heat to medium, spread them roughly in the bottom of the pan, cover with the egg mixture and let the bottom cook for about 5 minutes.
  5. Throw the skillet in the preheated oven to finish baking, 5-10 more minutes at the most, depending on how much it cooked on the stove top. Use a knife or toothpick that when inserted in the dish comes out clean to make sure the center of the pan is fully cooked. If you have any cheese in your fridge, cover the mixture with it before taking the pan to the oven.
Let it cool for a couple of minutes before slicing it.

Serve with toasted slices of buttered bread or a salad if you're trying to take it easy on carbs (remember your fancy omelet has potatoes in it!)

Hint: I had a small piece of parmesan in my fridge that I grated and incorporated to the batter. It tasted really good!


Tuesday, August 19, 2014

Quinoa Cauliflower bites

Feeling creative and looking forward to a healthy meal disguised as a treat I came up with these yummy bites! Lots of people don't know what to do nor how to cook quinoa so this is a nice basic recipe for beginners and experts!


It's not 100% clean, I'll be honest, since it has parmesan and turkey sausage but it was healthy and clean enough for my dinner! Especially considering amounts of these items are very reasonable.

Adjust to what you have in the fridge. All you have is broccoli and some old slices of turkey breast? No problem! Leftover zucchini and a piece of swiss lingering in your fridge? I'm sure that will work too.

Try these as an afternoon snack or as a side for a nice meal.

Base ingredients:

1/2 cup of quinoa
1 cup of vegetable or chicken broth (optional)
1 small head of cauliflower, steamed, chopped tiny
1/2 cup shredded parmesan
2 extra large eggs, free range preferably
2 T of extra virgin olive oil
2 small shallots
1 handful of fresh herbs (parsley, chives, thyme, oregano...)
1/2 package of smoked turkey sausage (approx. 7oz), diced small
1/4 teaspoon of salt (or to taste)
1/4 teaspoon smoked paprika
pinch of nutmeg
ground black pepper to taste

Cook 1/2 cup of quinoa by adding it to 1 cup of boiling liquid. I used chicken broth. As soon as it boils again, lower the heat and let it simmer covered. When water is absorbed and dries from surface, let quinoa finish cooking with the lid off until all water evaporates. A total of 20 minutes, approximately. Set aside.

Steam a head of cauliflower in a spaghetti pot for about 7 minutes or until vegetable is tender but still has a firm bite to it. Chop it carefully into small pieces after it cools. Do not let it cool inside the pot as it will keep cooking and form a puree! (Which, now that I think about, could work for this as well... )

In a large bowl, mix all ingredients. Fill a nonstick muffin tray with the mixture, flattening the surface of each one with a spoon to compact contents.

Cook in pre heated oven @385F for about 20 minutes, until golden brown. Let it cool for 5-10 minutes before removing from tray.

NOTES

> If desired, you can top each muffin with more parmesan or any cheese and broil it for a few extra minutes.

> I pan fried the diced shallots with the sausage for extra flavor!

> The best olive oil for this is the Mild & Buttery by Olive Ranch California

> Try using 1 cup of cheddar instead of the parmesan for a more moist and compact bite. (a bit fatter, too!)

> If you don't let it cool, it will be very hard to get the muffins out of the tray without crumbling.  Plan ahead!

> Hubby said he would be ok if I replaced the turkey sausage with real bacon and fried the shallots in its grease. I was aiming for something a bit healthier but, hey... Whatever works for you! Give it try if you're anything like Justin! It does sound delicious!


Fresh cod with tomato & shrimp sauce

Weekday menus need to be simple, healthy and tasty. But some weeks, we feel stuck to what we always eat. For us, we try to include fish every week and always make it a different preparation. That makes us feel creative and refreshed!

If you or your family usually don't eat fish because you're not sure on how to make it, this could become a favorite.
Give it a try! Double ingredients for a larger meal, as needed.


Serves 2:

4 thick fresh cod fillets seasoned with paprika, lemon and salt + pepper on both sides
1 lb of clean, skinless, uncooked shrimp, any size
1/2 lemon
1/4 teaspoon garlic or onion powder
1 small can of tomato sauce
1 small onion, diced
a sprinkle or crushed red pepper
1 small bell pepper in stripes (optional)
a handful of chives or italian parsley, chopped
salt & pepper to taste

Let the shrimp marinate for a few minutes in the lemon juice and garlic powder while you prepare the sauce.
In a large skillet, pan fry the onion with some oil spray or a dash of vegetable oil until traslucent, about 3 minutes.
Add tomato sauce and bell pepper. Let it simmer for 10 minutes. Add the seasoned fish fillets and cook for 5 minutes. Add the shrimp, geltly stirring without breaking the fillets and let it cook for 5 more minutes or until shrimp is pink. Let it sit for an extra 5 minutes and add the herbs before serving. Don't overcook or your shrimp can pratically disappear, depending on how small the ones you chose are!

Usually this would be served over white or brown rice but you can just serve a nice iceberg lettuce salad or with a side of olive oil tossed pasta.


Have a happy week!


Friday, August 15, 2014

Extra chocolatey chocolate cookie with chocolate chips

Did I mention you will need chocolate for this recipe?
An explosion of deliciousness, Nigella really nails it when it comes to making heavenly food out of simple ingredients! The original recipe is called "Totally Chocolate Chocolate Chip Cookies" from Nigella Express, p.190-191 but after eating it, I renamed it...

I was craving something sweet last night and I didn't even have a tub of ice cream to help me. Nigella came to my rescue!

I used high quality chocolate and butter, a really good vanilla extract and the result was incredible!

It's very rich but in a good way! It's not too sweet, so you can actually taste the cocoa and the chocolate and the cookie has a great soft texture without being chewy or greasy like knock off cookies from bakeries and big chain coffee shops.

Rethink cookies! These are grown up ones but I'm sure kids will be delighted as well. Pairs perfectly with a nice cup of coffee or a tall glass of ice cold milk!

The original recipe calls for 2 cups of semi-sweet or dark chocolate chips but I split that amount in half and added a cup of walnuts. My next batch will actually be 2/3 cup of dark chocolate + 2/3 cup white chocolate + 2/3 cup chopped almonds or walnuts. For extra chocolate, use all 3 kinds of chocolate chips/morsels only, instead: dark, milk and white. Oh! So many possibilities!

4 oz. semi-sweet chocolate
1 cup flour
1/4 cup unsweetened cocoa powder
1 teaspoon baking soda
1/2 teaspoon salt
1/2 cup softened butter, unsalted
1 teaspoon vanilla extract
1 egg, cold
1/2 cup light brown sugar
1/4 cup granulated sugar
1 cup dark chocolate chips or morsels
1 cup chopped walnuts

Preheat oven to 325 degrees F.
Melt the 4oz of chocolate in a measuring cup or small bowl. Set aside.
Cream the butter with the vanilla and the 2 sugars. Add the egg and melted chocolate.
In a large bowl, sift all the dry ingredients (salt, flour, baking soda and cocoa powder).
Mix the dry ingredients in the cream and finally, add the chocolate chips and/or walnuts.

With an ice cream scoop, scoop out the dough and place on a lined baking sheet (I used wax paper) about 2 1/2 " apart. Do not flatten them.

Bake for approximately 20-22 minutes, testing with a knife or tester until it comes out partially clean. Watch not to pierce a chocolate chip. Let it cool in the baking sheet for approximately 5 minutes and then transfer to a cooling rack. They're ready to be savoured at this stage!

Notes

- Let it cook for an extra couple of minutes if you prefer crunchy cookies. Not sure it's the best choice for this batter, but it's a matter of taste!

- Nigella suggests forming the cookies with the ice cream scoop and freezing half of them in case you only need a small batch (as it would be difficult to make half of this recipe when it only calls for 1 egg!). Then, when she needs it, she simply takes the formed cookies out of the freezer to thaw and bake with no effort.

- The book says this recipe yelds 12 cookies. I only got 10 so that's why I recommend cooking for 20-22 minutes. If you do get 12, cooking time is around 18 minutes. It will depend on the size of your ice cream scoop and how much you fill it.

Happy baking and happier eating!

Friday, August 1, 2014

Inside Out Cannelloni

My husband's favorite dish. Our favorite comfort food. Our go-to "we have visitors coming" dinner menu.

SO TASTY! And even if you've never mixed white and red sauces, please do! It makes all the difference and really brings out all the flavors in this dish.
I always serve a small salad beforehand and roasted chicken or steaks with it but to be honest, this will be the star of your meal so even if you have nothing to go with it, nobody will even notice! Here's a picture of the last one we made, right before it went into the oven.

Best made at 4 hands so you don't spend a lot of time in the kitchen but if you're anything like me, this is so rewarding to make and serve, that the prep time won't bother you the least bit!

Try using these ingredients: (serves 6-8, about 24 rolls)

1.75lb Virginia brand ham sliced medium-thin
1.5 lb of Lorraine or lacey baby swiss cheese (large slice), thick slices
1 recipe of Béchamel sauce
1.2 (approx) qt tomato sauce
1 box (16oz) angel hair pasta
Olive oil or butter to keep pasta from sticking
Freshly shredded or grated parmesan or grana padanno

You will also need:
a large cutting board or flat surface
1 rectangular serving dish (lasagna pan, 10" X 18" X 3" or larger)

Prepare sauces a day ahead, if possible, so it's less steps for you to do.
Right before putting the dish together, make the pasta according to box instructions. Don't forget the salt! Drain and drizzle with butter or olive oil, just enough so it doesn't get too sticky while you make the rolls.
On your cutting board or flat surface, open a slice of ham and put a slice of cheese on top. Add some angel hair pasta, about a handful, and roll it tightly. You will be able to tell if the amount of pasta is right: too much and the deli slices will break, too little and your roll will be too thin. It is important that the ham is on the outside so when you put the pan in the oven, the rolls will keep their shape and not stick together.

Set the rolls on the lasagna pan as you make them. For this amount, you will probably have 2 layers of 10-12 each, so when you're done with the first layer, add half of each sauce on it before starting the second one. Don't pack the rolls too tight in the pan or the sauce will not be able to get between each one of them.
Finish with the sauces without blending too well plus a layer of cheese (if you have any leftover) and/or some parmesan.
Bake it until bubbly, approximate 30 minutes. Broil on high for extra crispy cheese on top, about 4-6 minutes.

Once out of the oven, give the dish 5-10 minutes of rest so the rolls are not too soft or they can break as you try to serve them.

Simple yet delicious! A true crowd pleaser! Hope you enjoy it as much as we do.


Wednesday, July 16, 2014

Pudim de leite condensado

O brasileiríssimo pudim é muito fácil de fazer! Até pra nós, iniciantes na cozinha, sim! Siga esta receita à risca e eu garanto q não tem erro!

Eu gosto de um pudim com textura mais cremosa por isso a quantidade de ovos e tempo no forno. Se vc preferir mais molinho, reduza 1 ovo. 

Caramelar a forma deixa de ser um bicho de 7 cabeças se vc fizer a calda e depois simplesmente recobrir uma forma.

Vamos lá!


Ingredientes

Pudim
4 ovos grandes
1 lata de leite condensado
2 latas de leite. Integral, de preferência.
1/4 col (chá) - medida- de extrato natural de baunilha [opcional]

Calda
1 xícara (cheia) de açúcar
1 xícara (rasa) de água

Para fazer o pudim bata todos os ingredientes no liquidificador em potência alta. Se acrescentar o leite primeiro fica mais fácil.

Para a calda: 
Coloque o açúcar em uma panela grande de fundo grosso (para não queimar) com cabo longo. Misture com a água. 
Em fogo médio/baixo, remexa o açúcar apenas usando movimento circular da panela a cada 30 segundos. É muito importante que vc não mexa o açúcar com colher para ele não cristalizar. 
Continue mexendo, o açúcar vai começar a derreter e o líquido dourado vai incorporando o açúcar conforme vc agitar a panela. Com delicadeza, claro! MUITO cuidado pra não se queimar pois o açúcar começa a derreter a 160C mais ou menos e pode chegar a quase 200C, ou seja, muito mais quente que água fervendo!
Fique de olho no ponto. Vc quer uma calda bem dourada e engrossada mas sem queimar!

Se a sua forma for de inox ou alumínio e puder ir direto no fogo, vc pode fazer esse caramelo direto na forma.

Quando a calda estiver pronta, recubra a forma de pudim. Não se preocupe em recobrir muito uniformemente pois enquanto o pudim assa, o caramelo volta um pouco para o fundo da forma. 

Despeje o líquido sobre a forma caramelada. Asse o pudim em forno baixo (170C, pré-aquecido) por 2 horas em banho maria (encha uma assadeira grande com água e deixe no forno enquanto prepara o pudim e a calda. Observe: água não deve entrar na sobremesa ao colocar a forma do pudim nesta assadeira) Cubra a forma com a mistura com papel alumínio reforçado para que a água do banho não entre no doce. 

Deixe esfriar por 1 hora e leve à geladeira por 5 horas ou durante a noite.

Para desenformar, coloque a forma em um banho quente somente para soltar o pudim e derreter parte da calda. Desenforme em um prato grande e sirva com o restante da calda derretira sobre o doce.

Notas
Diz a minha mãe que se acrescentar 1 colher de sobremesa de amido à receita, os furinhos do pudim desaparece. Preciso experimentar pq eu prefiro pudim lisinho!

Para uma fôrma grande de pudim, dobre a receita. Geralmente, apenas 1 receita cabe em um copo de liquidificador.

Se precisar, passe delicadamente uma faca ao redor do pudim antes de desenformá-lo.

Tuesday, July 15, 2014

Protein Shake Idea

I love drinking a protein shake after my workout! It helps me not to feel so sore by the end of the day. But plain old vanilla or chocolate every day just won't cut it, right? Every morning I try to make something different, more flavorful and healthier.


Yesterday I made one that kept me full all morning (which NEVER, EVER happens) and at the same time it looked beautiful and tasted delicious so I had to share here! It is a great way to add vitamins and other nutrients as well as water into my day.

This shake is high in protein and low in carbs but it still has some carbohydrates coming from the fruits:

- 2 scoops of EAS 15 (abbott lean & tone protein shake from whey)
- 3/4 cup fat free or 1% milk
- 5 pitted cherries, fresh
- 4 small fresh strawberries
- 1/2 frozen banana, small
- 1/2 cup of water
- 3 ice cubes (or more if you like a frappée texture)
- 2 teaspoons (or 1 T if you can afford the calories) Justin's Almond Butter with honey <optional, just as good without>

Blend it at high or on the ice crusher setting of your blender for about 20-30s.

Sip it and enjoy!

Panquecas (QUASE) Dukan de abobrinha


Encontrei no site da Lucilia Diniz uma receita de panqueca de abobrinha e achei super interessante! Quando vi os ingredientes pensei comigo mesma: "Nossa! Que receita mais sem graça!"! Sabia que dava pra fazer uma coisa bem gostosa a partir da ideia usando itens mais nutritivos, reduzindo o carboidrato e acrescentando mais sabor.
Segue a minha receita:


1 abobrinha caipira grande com casca, ralada no ralo grosso
1 ovo batido

3 col (sopa) de farinha integral

1 cebola pequena picada miúdo

2 col (sopa) farelo de aveia ou trigo

1 punhado generoso de salsinha e cebolinha

¼ col (chá) alho desidratado

¼ col (chá) de páprika

1/8 col (chá) [1 ponta de faca] de fermento em pó químico

Sal e pimenta do reino a gosto

1 col (sopa) cream cheese ou requeijão light (opcional)

1 pitada de noz moscada (opcional)

Azeite para regar (opcional)

Óleo para fritar

Preparo

Lave a abobrinha e rale-a com a casca. Salgue a gosto (1/2 col chá aproximadamente) e deixe em um escorredor ou peneira sobre um bowl por 5 a 15 minutos, enquanto prepara a massa. Esprema antes de usar.

Em outro bowl, bata o ovo. Misture com os temperos, a cebola e o cream cheese se estiver usando. Incopore a farinha, o farelo e o fermento e acrescente a abobrinha escorrida e espremida.

Em uma frigideira antiaderente coloque um fio de óleo e frite porções retiradas com um pegador de sorvete, 1 por vez. A massa é bem molhadinha, não se preocupe, mas ela seca depois de frita. Frite cada lado por 2 a 3 minutos em fogo médio-alto.

Sirva com um toque do seu azeite preferido.
Para deixar a panquequinha Dukan, simplesmente substitua a farinha integral por farelo de aveia, use requeijão sem gordura ou omita o ingrediente e pule o azeite!

Tuesday, April 22, 2014

Spiced Carrot Cake

Needless to introduce this classic Easter/Spring cake!
Altough I must say, my recipe concentrates the sweetness and a punch of cinnamon into the batter and has a rich vanilla, not so sweet frosting to it. The sweetened condensed milk and large pieces of grated carrots gives this cake a delicious texture and a rich flavor like no other carrot cake you've ever tried.

Feeling like making it? You'll need:

for the cake:

4 eggs

1 cup light brown sugar

1 can sweetened condensed milk

¾ cup oil

2 Tbsp of sour cream

1 ½ cups all purpose flour, unbleached

½ cup corn starch

3 cups grated carrots

1 teaspoon ground cinnamon

2 teaspoons baking powder

1 teaspoon baking soda

1 cup chopped pecans (save 2 T or so for decorating)


Frosting & filling:

2X8 oz cream cheese

3 cups confectioner’s sugar, sifted

1 teaspoon natural vanilla extract

6 Tbsp butter, softened


For the cake:

Beat at medium speed the eggs with the condensed milk, sugar, oil and sour cream until creamy and homogeneous, about 4 minutes.

In a separate bowl, whisk the dry ingredients: flour, corn starch, cinnamon, baking powder, baking soda.

Turn mixer off and incorporate the dry mixture into the cream. Fold in carrots and pecans.

Bake in preheated oven @350 degrees F using 2 X 9” spring form pans sprayed with PAM baking or coated with butter and flour, distributing the batter evenly into each one.

Bake for about 50 minutes or until a toothpick inserted in the center of the cake comes out clean. Don’t over bake it! Make sure you keep an eye on your cake around 35 minutes and take it out of the oven as soon as it dries. The 350 temperature is also very important so the cake does not form a crusty edge.

For the filling, just mix the cold cream cheese with softened butter until smooth. Incorporate vanilla and sugar little by little, reducing the speed of the blender during each addition so your kitchen isn’t all dusty!

You can cut each layer of the cake in half and make a really tall cake with 3 layers of filling or you can simply put one layer of filling. The first option is always my favorite because the cake gets a lot more moist. I also added ½ cup of 2% milk “seasoned” with 1T of sugar and ¼ teaspoon cinnamon, spreading a few tablespoons at a time in all the layers of the cake. I added 2/3 of the batter to one pan and 1/3 to another, baked them separately because the times were going to be different, then I cut the larger cake in half and made 2 layers of filling and topping.

The amount of frosting is enough for a naked cake. If you want to decorate or cover the entire thing, make another ½ recipe of the cream cheese frosting.
Enjoy!

Tuesday, April 8, 2014

Sweet Corn & Chicken Breast Savory Triffle

The combination of chicken breast and creamy sweet corn is a typical brazilian comfort food. This triffle combines both things in one pyrex. Pulling these elements together, a nice layer of short pasta (I chose elbows). Perfect for a weekend meal or a quick weeknight dinner!


Ingredients (4 large portions!)

2 lbs of chicken tenderloins or strips
1 teaspoon paprika
1/2 teaspoon garlic powder
1/2 T tomato paste
1 small white onion
1 can of cream of chicken
1 can of milk
1 can sweet corn with the liquid
2 T all purpose flour
2 T butter
1 brick of cream cheese (8oz)
chives to taste
S&P to taste
Grated parmesan or your favorite cheese to broil
1/2 - 1 box of elbows (or any other short pasta)

>> Season the tenderloins with paprika, salt, pepper, garlic powder and tomato paste. Pan fry them until golden brown in a heavy bottom pan using just a little bit of oil or spray. Set them aside.

>> In the same pan, sweat the chopped onion in the butter. Add the flour and mix. Incorporate the liquid from the corn can until a smooth cream is formed (no lumps of flour in the pieces of onions). Add the corn, the soup, cream cheese and the milk. Season with more salt and pepper if desired and chop a bunch of chives. Let it simmer stirring occasionally in medium heat, about 10 minutes.
Cook the pasta acccording to packaging instructions.

>> In a medium rectangular pyrex, make a chicken tenderloin layer, cover with a layer of pasta and top everything with the cream of corn. Add the cheese on top and take it to the oven to finish cooking and to broil. About 30 minutes @ 380F. Broil on high for 4 minutes.

>> Let it cool for 10 minutes so the cream develops some consistency and isn't too liquid.

Serve with wilted spinach or a nice lettuce salad for a homemade touch!

Enjoy!

Note: For a spicy twist, grate 4 oz (1/2 block) of white cheddar chipotle cheese. YUMMY!!!


Sunday, February 23, 2014

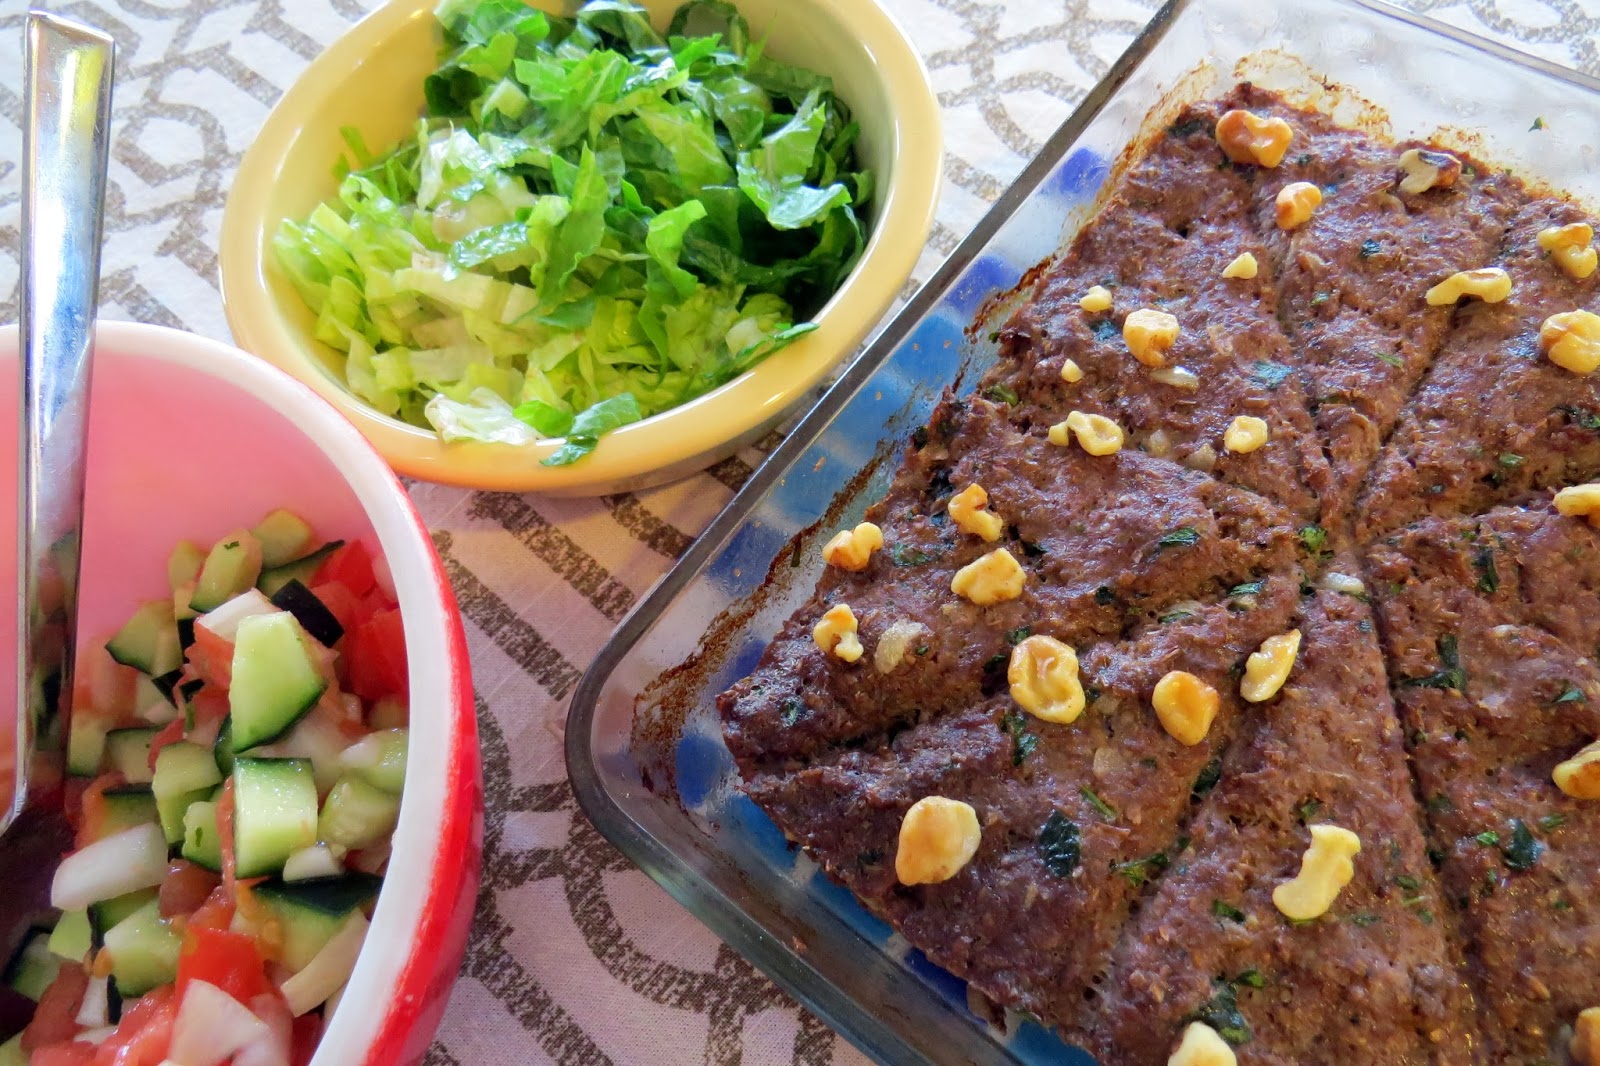
Quibe Assado com Nozes

Variar é o segredo pra não enjoar! Um quibe assado sempre cai bem! Uma versão mais baixa em carboidratos adaptada à dieta Dukan leva farelo de trigo no lugar do trigo integral. Igualmente deliciosa!

Ingredientes
1 xíc (chá) farelo de trigo
2 xíc (chá) de água quente
900g carne moída magra
1 cebola pequena
1 punhado de hortelã ou salsinha fresca picados
40g nozes picadas tostadas em óleo ou manteiga 
sal a gosto
pimenta síria (ou pimenta do reino com uma pitadinha de canela)
azeite extra-virgem

Massa:
Deixe o trigo de molho em água quente por 20 minutos. Escorra.
Usando metade da carne moída, misture com o trigo, tempere com 1/2 cebola ralada, salsinha ou hortelã, sal e pimenta síria a gosto. Misture bem e divida em 2 partes iguais. Reserve.

Recheio
Refogue o restante da carne moída com a outra metade da cebola picadinhas. Tempere com sal e pimenta síria. Deixe em fogo baixo até secar a água. Incorpore as nozes tostadas

Forre o fundo de um pyrex ou forma retangular pequena com metade da massa. Adicione o recheio e cubra com o restante da massa. O jeito mais fácil é cobrir por partes em lugar de tentar esticar toda a massa de uma só vez.

Asse em forno médio (200C) por aproximadamente 30 minutos.

Sirva decorado com hortelã fresco, regado com azeite e com uma bela porção de coalhada seca e tabule! HMMMM!

Lembrete!

Se estiver na dieta Dukan, omita o azeite e as nozes.
A salada pode ser uma variação do taboule: vinagrete de pepino, cebola e tomates sem trigo sobre alface.